Step-by-Step: Add Client To Active Directory Domain – Part 2
This article will guide users on how to add a client to an Active Directory Domain Services.
For server-sided configuration, see Part 1.
Connect Client To Domain
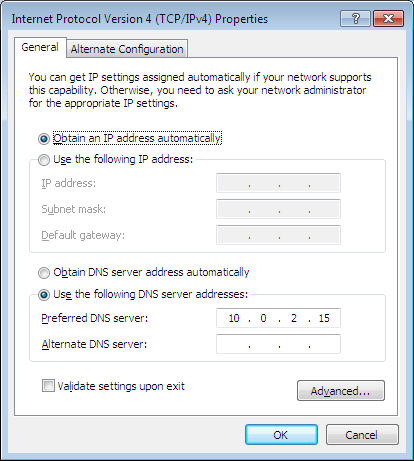
- Open Network and Sharing Center. Click Change adapter settings on the left. Right-click on Local Area Connection, select Properties. In the Local Area Connection Properties window, select Internet Protocol Version 4 (TCP/IPv4) and click Properties.
- Under General tab, make sure that Obtain an IP address automatically is checked. Check Use the following DNS server addresses and key in the server’s IP address. Click OK when done.
- Right-click My Computer, select Properties.
- Under Computer name, domain, and workgroup settings, click Change settings and System Properties window will pop up.
- Under Computer Name tab, click Change and Computer Name/Domain Changes window will pop up. Give a recognizable name for the PC.
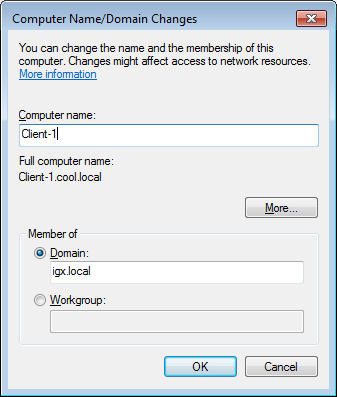
- Check Domain and key in the domain created earlier and click OK.
- User will be prompt to key in a username and password to join the domain. Key in the user account that is registered to the active directory domain.
- After successfully joining the domain, user will be prompt to restart the PC.
Note: If you are using a virtual machine, don’t forget to configure the bridged adapter or you won’t be able to connect them to the same network.