Create And Link PostgreSQL Database With IGX Using Data Source Name (DSN)
PostgreSQL is also known as Postgres, is an open-source and free relational database management system (RDBMS). It supports a wide variety of native data types.
Follow these simple steps below to create and link PostgreSQL database with IGX SCADA using Data Source Name (DSN).
- Open pgAdmin from the Start menu.

- In pgAdmin, expand the Servers tab on the left sidebar.

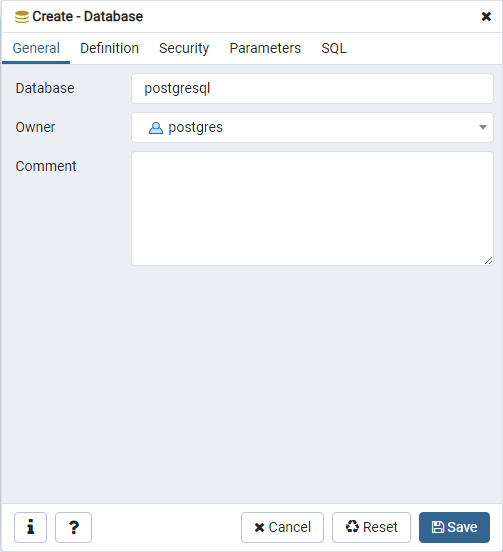
- Right-click on Databases, select Create and select Database.

- Give the database a name and click Save.

- Next, download PostgreSQL ODBC 32-bit/64-bit driver here and install it.

- From the Start menu, search for ODBC Administrator press Enter.
NOTE: There are 2 ODBC Administrator; 32-bit and 64-bit. If a 32-bit PostgreSQL ODBC driver was installed, use the 32-bit ODBC Administrator. Install both 32 and 64-bit if you are not sure.
- Click on the System DSN tab in the ODBC Data Source Administrator and click the Add button.

- From the list of drivers in the Create New Data Source window, scroll down and select PostgreSQL Unicode and click Finish.

- Fill in the required information in the PostgreSQL Unicode ODBC Driver (psqlODBC) Setup window and click Test.

NOTE: Insert the database name created in pgAdmin for Data Source and Database. Insert “localhost” or “127.0.0.1” for Server if the database is on the same computer. Insert pgAdmin username and password for User Name and Password.
- If all the information provided are correct and the connection test is successful, click OK and click Save.

- Click OK to close the ODBC Data Source Administrator.
- Next, open Ecava Integraxor Project Editor from the Start menu. Click here to download a copy of IGX SCADA for free today!
- Go to File, select New Project and click OK.

- Click on Database in the Task menu on the left side.

- Create a new entry and give it a name. Click on the Connection String area and click on the three dots on the right.

- A Data Link Properties window will appear. Click on the Connection tab. Under Use data source name, click on the drop-down list and select the database created earlier.

Note: The database will not appear in the drop-down list if users skipped the ODBC Administrator steps.
- Click on Test Connection to see if your connection to the database is working. Click OK when done and click OK again to close the Data Link Properties window.

- Next, select the desired timer under Log Freq. This will define how frequent new data will be logged to that database.
- Save project.
Lastly, you may download a free copy of IGX Web SCADA and give it a try! Click here to view our online demo.
Please do not hesitate to contact us if you have any questions.
